
Indoor growing
How to Grow Oyster Mushrooms in a Bucket
9 min read
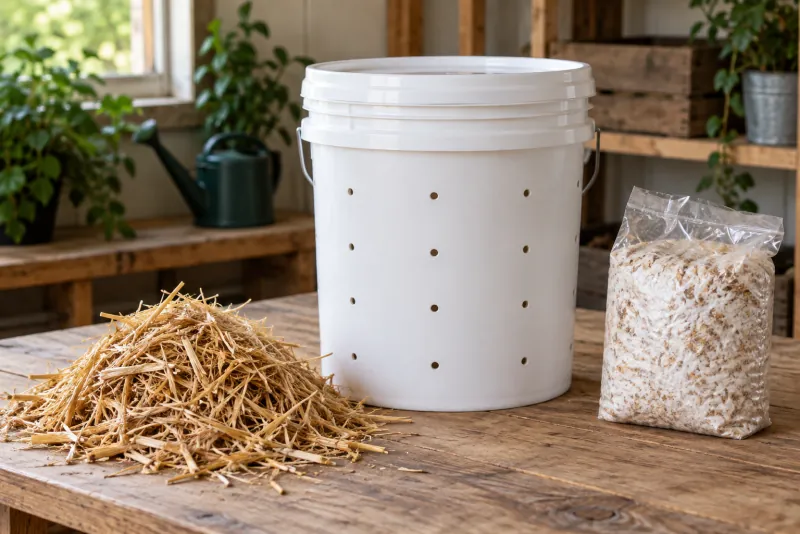
A five-gallon bucket doesn’t look much like mushroom-growing equipment. That’s part of its appeal.
It’s inexpensive, reusable, easy to clean, and already about the right size for a small batch of oyster mushrooms. Drill some openings in the sides, fill it with prepared straw and spawn, and those openings become the places where mushroom clusters can form.
The basic idea is simple. Getting healthy mushrooms still depends on clean handling, properly prepared straw, suitable temperatures, enough humidity, and plenty of fresh air.
At Simply Mushroom, we use chopped straw soaked for about 18 hours in a cold-water lime solution for our bucket grows. It has worked well for us and provides a practical foundation for the method described in this guide.
This guide explains how the process generally works and gives beginners a sensible place to start.
Why oyster mushrooms work well in buckets
Oyster mushrooms colonize quickly and can grow on relatively low-nutrient plant materials such as straw. Their speed helps them take possession of the substrate before competing molds and bacteria gain too much ground.
That doesn’t make them contamination-proof, but it does make oysters more forgiving than many other cultivated mushrooms.
Buckets also suit the way oyster mushrooms grow. The mycelium colonizes the straw inside, then the mushrooms find fresh air and light through the openings in the bucket. Each opening can support a cluster.
This method is intended for oyster mushrooms. Lion’s mane, shiitake, chestnut, and other species have different substrate and container preferences and shouldn’t automatically be substituted into the same process.
What you’ll need
For a basic cold-water lime bucket grow, gather:
- A clean, food-grade five-gallon bucket
- A lid that fits the bucket
- A drill and approximately 5/8-inch bit
- Clean, dry straw
- Oyster mushroom spawn from a reputable supplier
- Hydrated lime suitable for cold-water substrate treatment
- A separate soaking container
- Clean water
- Something clean to hold the straw below the water
- pH test strips suitable for alkaline solutions
- Gloves and eye protection
- A clean surface or screen for draining the straw
- A label for the oyster strain and inoculation date
The spawn may be carried on grain or sawdust. Follow the supplier’s storage instructions and use it while it’s healthy and active.
Don’t use wild mushrooms as spawn. Starting with a known cultivated strain removes a great deal of uncertainty and reduces the risk of growing something other than what you intended.
For a broader look at bucket and outdoor-bed supplies, see our tools and supplies guide.
Tools and supplies
These are examples of suitable products from established suppliers, gathered to help you find what the guide describes.
Oyster grain spawn
Grey Dove is a dependable oyster variety for bucket growing. Field & Forest also carries several other oyster strains for different growing temperatures.
Horticultural hydrated lime
For cold-water lime treatment, look for high-calcium hydrated lime with a low magnesium content. Check the current product label before buying because formulations can change.
Hydrated lime is caustic. Avoid breathing the dust, protect your eyes and skin, and follow the product label.
Wide-range pH paper
Useful for checking that the lime soak has reached the strongly alkaline range described in the guide.
Five-gallon food-grade bucket
A basic food-grade bucket works well. This example’s lid is sold separately, so use a compatible lid.
5/8-inch drill bit
A standard spade bit suitable for making fruiting holes in a plastic bucket.
These are examples of suitable products from established suppliers. Simply Mushroom doesn’t currently receive compensation from these links. Products and formulations can change, so confirm labels and specifications before buying.
Prepare the bucket
Clean the bucket thoroughly before drilling or filling it.
Drill approximately 5/8-inch openings around the sides in a staggered or diamond pattern, roughly six to eight inches apart. The openings need to be large enough for oyster clusters to emerge but not so numerous that the straw dries rapidly.
A few small drainage holes near the bottom can help prevent free water from collecting inside. Place the bucket where any drainage won’t damage the floor beneath it.
Smooth away sharp plastic edges left by drilling. Then wash and sanitize the bucket again before use.
Buckets can be reused, but they should be emptied and thoroughly cleaned between grows. Old substrate caught in scratches, around the rim, or beneath the lid can carry contamination into the next batch.
Chop the straw
Shorter pieces of straw are easier to treat, drain, mix, and pack.
The straw doesn’t need to be reduced to dust. Pieces a few inches long are manageable and still leave enough structure for air to move through the packed substrate.
Use clean, dry straw without visible mold or a damp, musty smell. Straw that’s already deteriorating is a poor place to begin.
Cutting straw is messy, so doing it outdoors or somewhere that’s easy to sweep will make the job considerably more pleasant.
Use the correct kind of lime
Cold-water lime treatment uses hydrated lime, which is calcium hydroxide. It isn’t the same thing as ordinary garden lime or dolomitic lime.
Check the guaranteed analysis before buying it. Cultivation guidance generally calls for hydrated lime containing less than 10 percent magnesium. A product with substantial magnesium may interfere with mushroom growth.
Hydrated lime is strongly alkaline. Its dust can irritate your lungs and eyes, and the mixed solution can burn skin. Wear gloves and eye protection, avoid breathing the dust, mix it in a ventilated area, and follow the safety directions on the product.
Keep children and animals away from the lime, soaking container, and wastewater.
Prepare the lime bath
Fill the soaking container with enough clean water to completely submerge the chopped straw.
Add hydrated lime according to a tested cultivation recipe for the specific product you’re using. Lime composition can vary, so a scoop that works with one product shouldn’t automatically be copied for another.
Use suitable pH strips to check the solution. Cold-water lime treatment works by creating a sharply alkaline environment that knocks back many of the organisms already living on the straw.
This is better described as lime pasteurization or alkaline treatment than true sterilization. The goal isn’t to remove every living organism. It’s to give fast-growing oyster mycelium a strong head start.
Add the straw gradually and make sure it becomes fully wet. Use a clean weight or grid to hold everything beneath the surface.
For more context on cold-water lime treatment and small-batch pressure cooking, see how we prepare mushroom substrate.
Let the straw soak
Allow the chopped straw to remain submerged for approximately 16 to 18 hours. Our own batches have soaked for about 18 hours with good results.
Longer isn’t necessarily better. Leaving straw in a highly alkaline solution for too long can create new problems instead of improving the treatment.
Keep the soaking container covered or otherwise protected from animals, rain, leaves, and debris.
Plan for the wastewater before beginning. Used lime water remains highly alkaline and shouldn’t simply be poured onto the ground, into a storm drain, or near a stream. Test it, neutralize it carefully to an acceptable pH, and follow local disposal requirements.
Drain it well
Remove the straw and let it drain on a clean screen, rack, basket, or other cleanable surface.
The finished straw should be thoroughly moist without dripping continuously. When squeezed firmly, it may release a few drops of water, but it shouldn’t send out a stream.
Overly wet straw leaves water collecting inside the bucket and reduces the air available to the mycelium. Straw that’s too dry may colonize slowly or stall.
Let the straw drain naturally instead of placing it on bare soil or a surface that will immediately reintroduce dirt and debris.
Add the spawn
Once the straw has drained, it’s ready to be mixed with oyster spawn.
Clean your hands, gloves, work surface, and any tools that will touch the prepared straw. Bucket growing doesn’t require a laboratory, but this is the point when careless handling can undo much of the benefit of treating the substrate.
Break the spawn apart inside its bag so it can be distributed evenly.
You can mix the spawn throughout the straw before loading the bucket or alternate packed straw with thin, evenly distributed layers of spawn. Either approach can work. What matters is avoiding large areas of straw that have little or no spawn nearby.
Use the amount recommended by the spawn supplier. Using too little spawn usually means slower colonization and more time for competing organisms to become established.
Pack the bucket
Add the inoculated straw a little at a time and press it down firmly.
The goal is an evenly packed bucket without large empty pockets. Don’t crush the straw into a waterlogged, airless mass, but don’t leave it loose enough to settle dramatically later.
Fill the bucket close to the top and attach the lid.
Wipe loose straw and spawn away from the outside of the bucket, especially around the fruiting holes. Then label it with the oyster strain and inoculation date.
Let the bucket colonize
Place the filled bucket out of direct sunlight in a clean area that stays within the temperature range recommended for the oyster strain.
Different oyster strains prefer different temperatures. Blue oysters generally tolerate cooler conditions, while golden and pink oysters tend to favor warmer ones. “Room temperature” isn’t precise enough to suit every strain in every season.
The holes provide some gas exchange during colonization. Don’t cover them with airtight tape or wrap the entire bucket in sealed plastic.
Over the next couple of weeks, white mycelium should spread through the straw. The exact timing depends on the strain, spawn rate, temperature, straw preparation, and bucket density.
Try not to open the lid repeatedly to check progress. Every unnecessary opening introduces fresh air, dust, and organisms from the room.
Give the mushrooms somewhere suitable to fruit
Once the straw is well colonized, oyster mushrooms need high humidity, indirect light, and much more fresh air.
The mushrooms should begin forming through the holes in the bucket. Small pins can dry out quickly, so consistent humidity becomes important once they appear.
Fresh air matters just as much. Oyster mushrooms grown without enough air exchange often develop long stems and undersized caps. A sealed closet or plastic container may hold humidity, but it can also trap carbon dioxide.
A suitable fruiting location might be a small controlled grow space, a humidified tent with ventilation, or a protected outdoor location when the temperature and humidity suit the strain. Outdoor fruiting is simpler, but it gives you less control and exposes the mushrooms to insects and rapidly changing weather.
Don’t spray developing clusters so heavily that water continually sits between the mushrooms. Maintain humidity around them while still allowing their surfaces to dry normally.
Harvest the whole cluster
Oyster mushrooms are usually ready when the caps have opened but before their edges turn sharply upward and release large amounts of spores.
Harvest the entire cluster together. Hold it near the base and twist it away cleanly, or cut it with a clean knife.
Remove any remaining stem material from the opening so it doesn’t decay there. Refrigerate the mushrooms promptly in breathable packaging.
Cultivated oyster mushrooms should still be inspected before eating. Discard mushrooms that are badly insect-damaged, decomposing, unusually discolored, or otherwise questionable.
Watch for contamination
Healthy oyster mycelium is normally white. Other colors or unpleasant odors deserve attention.
Warning signs can include:
- Green, black, pink, or orange growth
- Sour, rotten, or strongly fermented odors
- Slimy substrate
- Colonization that stops while unfamiliar growth spreads
- Large areas of straw that remain wet and uncolonized
Don’t lean over a questionable bucket and inhale deeply to identify it. If contamination is extensive, isolate the bucket from the growing area and dispose of the contents responsibly.
A failed bucket doesn’t necessarily mean the entire method is wrong. Contamination can come from poor straw, weak spawn, excess water, slow colonization, an unsuitable temperature, dirty equipment, or simple bad luck.
Write down what happened before cleaning the bucket and trying again.
What happens after the first harvest
A colonized bucket may produce more than one flush.
After harvesting, continue providing suitable humidity and fresh air. The mycelium will usually rest before forming another round of mushrooms. Production commonly decreases with later flushes as the straw’s available food and moisture are used.
If the substrate has dried substantially, some growers rehydrate it between flushes. How this is done depends on the bucket, substrate, and cleanliness of the fruiting area, so don’t automatically flood a bucket that’s already wet.
Eventually, the substrate will stop producing or contamination will take over. At that point, remove it from the growing area and clean the bucket thoroughly before using it again.
Spent straw may be compostable if it’s free from concerning contamination and local conditions allow it.
Keep the first attempt simple
Bucket growing becomes confusing when too many variables change at once.
For a first grow, use:
- One oyster strain
- One kind of clean straw
- One established treatment method
- A consistent bucket design
- Spawn from one reliable supplier
- A fruiting location you can check regularly
Record the strain, preparation date, soak time, approximate temperature, first signs of colonization, pinning date, harvest date, and any contamination.
You don’t need to call it an experiment. You’re simply paying attention.
A clean bucket, properly treated straw, healthy spawn, and suitable fruiting conditions are enough to learn a great deal from the first attempt. Once that process works reliably, changing one part at a time becomes much more useful.