
Grow
How to Grow Wine Cap Mushrooms in a Mulch Bed
8 min read
Wine caps are one of the easiest mushrooms to add to a garden, orchard, or other mulched area. You don’t need logs, indoor grow equipment, or a carefully sterilized substrate. Give them hardwood mulch, soil contact, shade, and enough moisture, and the mycelium can do most of the work underground.
Wine caps are also called king stropharia or garden giants. Their scientific name is Stropharia rugosoannulata. They grow by breaking down woody material, making an ordinary mulch bed both their food source and growing space.
We’ve had moderate success using the simplest approach: mixing wine-cap spawn into standard hardwood mulch, watering it, and waiting. There are more deliberate ways to build a bed, but this doesn’t need to become a complicated project.
What you’ll need
For a basic wine-cap bed, gather:
- Wine-cap sawdust spawn
- Untreated hardwood mulch or wood chips
- A garden hose or watering can
- A partly shaded piece of ground
- Straw, leaves, or plain cardboard if you want an extra moisture-holding layer
You don’t need to sterilize or pasteurize the mulch. This is an outdoor bed, so the goal isn’t to create a sterile environment. You’re simply giving the wine-cap mycelium a good supply of fresh woody material and a chance to establish itself.
Avoid dyed mulch, pressure-treated wood, and wood from an unknown or contaminated source. Standard hardwood mulch is fine. A mix of chips, bark, and smaller pieces can work well because the smaller material holds moisture while the larger pieces take longer to break down.
For a broader look at outdoor-bed supplies, see our tools and supplies guide.
Choose a good location
Wine caps can grow in garden paths, around shrubs, beneath fruit trees, between raised beds, or in a dedicated mulch bed.
The best location is:
- In direct contact with the soil
- Shaded for at least part of the day
- Somewhere that won’t be tilled or disturbed
- Close enough to a hose that watering isn’t a burden
- Well drained rather than constantly flooded
The bed doesn’t need to be in deep woodland shade. Partial shade, dappled light, or the shade provided by garden plants can be enough. The bigger concern is keeping the mulch from drying out for long stretches.
Wine caps can be planted during much of the growing season. A mild, rainy period makes establishment easier, but you can start a bed whenever you’re prepared to keep it watered.
Prepare the ground
You don’t need to excavate a large hole.
Clear away thick weeds and grass so the mulch can sit close to the soil. Wine-cap mycelium benefits from that soil contact and may eventually spread beyond the original bed.
If the area is grassy, you can put down a single layer of plain brown cardboard first. Wet it thoroughly and remove tape, glossy labels, and heavily printed sections. Cardboard can suppress the grass and help retain moisture, but it’s optional.
Add the spawn and mulch
A finished bed about four to six inches deep is a good target.
There are two easy ways to inoculate it.
The mixing method
Spread the hardwood mulch over the bed, break the spawn into small pieces, and mix it through the upper portion of the mulch. Try to distribute it across the whole bed rather than leaving it in one large clump.
This is close to what we’ve done: wine-cap spawn mixed into ordinary hardwood mulch, followed by water and patience.
The layering method
Put down roughly half of the mulch, scatter crumbled spawn evenly across it, and cover it with the remaining mulch.
You can create several thinner alternating layers in a deeper bed, but two layers are usually enough for a straightforward backyard project.
Spawn rates vary between suppliers. As a general reference, a 5½-pound bag is commonly used for a bed of roughly 30 to 50 square feet at four to six inches deep. Follow the instructions that come with your spawn when they differ.
Using more spawn usually gives the mycelium more starting points. Stretching a small amount over a very large bed can make establishment slower and give other fungi more time to move in.
Water the bed thoroughly
Once the spawn is mixed or layered into place, soak the bed evenly.
The mulch should be damp throughout, not just wet on the surface. It shouldn’t remain waterlogged, though. Think of the moisture level of a wrung-out sponge: thoroughly damp without water pooling underneath.
For the first several weeks, check the bed regularly. Water when the upper mulch begins drying out. A thin covering of straw or leaves can help hold moisture during dry weather.
Once the bed is established, normal rainfall may handle much of the work. During hot or dry stretches, it will still benefit from occasional deep watering.
What happens next
Wine caps aren’t an instant crop. The mycelium first needs to spread through the mulch.
If you gently lift a few pieces after a month or two, you may see white, threadlike or ropey growth connecting the wood. That’s a good sign. Check without repeatedly digging through and disturbing the bed.
Mushrooms may appear within a few months, but timing varies considerably. A bed started late in the year may not fruit until the following season. Rain and changes in temperature often help trigger a flush.
A bed can be healthy even when no mushrooms are visible. Most of the organism remains in the mulch and soil between fruitings.
Harvesting wine caps
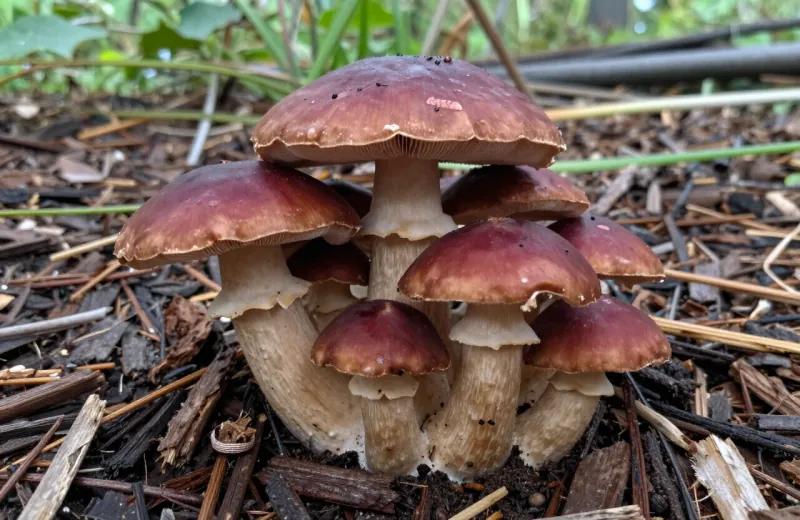
Young wine caps usually have burgundy or reddish-brown caps, although the color can fade considerably as they grow. They develop thick, pale stems and a noticeable ring beneath the cap. Mature gills become dark gray to purple-brown.
Harvest them while they’re still firm, ideally before the caps become very large and flat. Older mushrooms can become damaged quickly by insects, slugs, heat, and rain.
Twist or cut them near the base, then brush away mulch and soil. Refrigerate them promptly and cook them thoroughly before eating. When trying any edible mushroom for the first time, eat only a small amount.
Cultivating wine caps doesn’t guarantee that every mushroom appearing in the bed is a wine cap. Other fungi can fruit from the same mulch. Never eat a mushroom based only on where it grew or a comparison with online photographs. Confirm the identification using several characteristics, and consult an experienced local identifier when you’re uncertain.
Keeping the bed productive
Wine caps consume the mulch as they grow, so an established bed eventually needs more food.
Add a fresh layer of untreated hardwood mulch when the existing material has noticeably broken down. You can gently mix some colonized material into the new mulch or simply top-dress the bed and keep it moist.
Colonized chips can also be moved into another prepared bed. Take material showing healthy white mycelium, mix it with fresh hardwood mulch, water it, and treat it like a new planting.
Don’t remove too much from the original bed at once. Leave plenty of colonized material behind so it can continue growing.
If nothing seems to be happening
A slow bed isn’t necessarily a failed bed. Before starting over, check the most common problems:
The mulch dried out
This is the biggest concern, especially while the mycelium is getting established. Water deeply and consider adding a light straw or leaf covering.
The bed is too exposed
Full afternoon sun can dry a mulch bed quickly. Add shade with plants or choose a more protected location for the next bed.
The spawn was spread too thinly
A small amount of spawn scattered across a large area may take much longer to colonize. Concentrating it in a smaller bed usually gives it a better start.
The mulch was already heavily colonized
Old mulch that is already full of other fungi gives wine caps more competition. Cleaner, relatively fresh hardwood material is usually a better starting point.
The bed is colonized but hasn’t fruited
If you can find healthy white mycelium beneath the surface, give it more time. Keep the bed damp and watch it after soaking rains and weather changes.
The simple version
If you want the entire process reduced to one paragraph, here it is:
Choose a partly shaded area with soil contact, spread four to six inches of untreated hardwood mulch, mix or layer wine-cap spawn through it, water it thoroughly, and keep it from drying out while the mycelium establishes. Then wait. Check after rain, add more hardwood mulch as the bed breaks down, and confirm every mushroom before eating it.
Wine caps are a good reminder that mushroom growing doesn’t always need to happen in a tightly controlled space. Sometimes a bag of spawn, a pile of hardwood mulch, and a reasonably damp corner of the garden are enough to get started.