
Growing
How to Choose and Cut Trees for Mushroom Logs
9 min read
Good mushroom logs begin before the chainsaw ever comes out. The tree species matters, but so do the season, the condition of the tree, its size, and how quickly you inoculate the wood after cutting.
At Simply Mushroom, we normally cut trees after the leaves have fallen and continue through winter into early spring, stopping when the trees begin leafing out again. Cooler weather means fewer active insects and competing fungi. Bare branches also make the work considerably easier: the trees weigh less, there’s less brush to handle, and we aren’t dragging entire crowns full of leaves through the woods.
Once a tree is cut, we don’t leave it sitting around for months. We generally allow a short resting period and inoculate it within a week or two. That gives the wood a little time to rest while keeping the window small enough that wild fungi have less opportunity to establish themselves first.
Choose your trees before cutting season
One of the easiest mistakes is waiting until winter to decide which trees to use. Bark can be difficult to identify on its own, especially if you don’t work with trees every day.
We prefer to scout during late summer or early fall while the leaves are still visible. Spring can also be useful once the trees have fully leafed out. Seeing the leaves, bark, shape, and growing location together makes identification much more reliable.
When we find a suitable tree, we wrap it with blaze-orange ribbon so it’s easy to locate after the leaves fall. We use blue ribbon for trees we intend to preserve, including useful wildlife trees, productive nut or fruit trees, and anything else we don’t want accidentally included in the cutting plan.
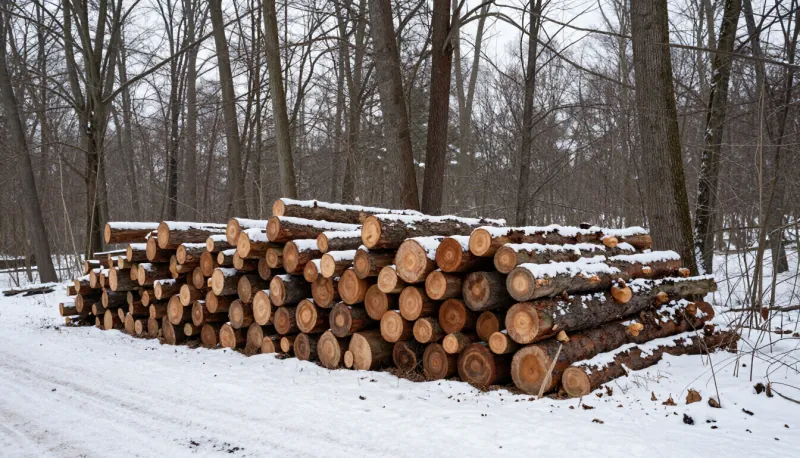
For most mushroom logs, we target trees roughly four to eight inches in diameter. Logs in that range are large enough to retain moisture and remain productive, but still manageable enough to cut, move, inoculate, and stack. We’ll use larger trees when it makes sense, though the extra weight changes how the job needs to be approached.
Which trees make good mushroom logs?
The best mushroom logs usually come from healthy, living hardwood trees. Fresh wood contains the moisture and stored energy the mushroom culture needs, while intact bark helps hold that moisture in during the long colonization period.
We avoid logs that were already dead, visibly decaying, badly damaged, or losing large areas of bark. Wild fungi may already be established inside that wood, giving the mushroom spawn more competition before it has a chance to colonize the log.
Tree species also matters. White oak is one of our main choices, especially for shiitake. It’s dense, holds moisture well, and can remain productive for several years. The tradeoff is weight: even a moderately sized oak log can be difficult to move.
Sweetgum is another useful option in our area. It’s often considered a low-value or nuisance tree, but we’ve successfully grown several oyster varieties and chestnut mushrooms on it. Sweetgum generally doesn’t remain productive as long as oak, but it’s lighter, easier to handle, and lets us turn an underused wood into food.
Whatever species you choose, match it to the mushroom you plan to grow. A tree that works well for oysters may not be the best choice for shiitake, lion’s mane, or another species. Spawn suppliers’ compatibility charts can help narrow the options, but local conditions and the condition of the wood still matter.
Choosing a suitable tree doesn’t automatically mean it should be cut. We also consider what that tree is doing for the property. Trees that produce food, provide wildlife habitat, protect a stream bank, offer valuable shade, or have long-term timber potential may be more useful standing.
Whenever possible, we target trees that already make sense to remove—crowded trees, poorly positioned trees, storm-damaged trees that are still alive and usable, or species we’re trying to manage more actively. That way, mushroom production becomes part of caring for the land rather than the only reason for cutting.
For a closer look at two woods we use in eastern Virginia, see our field notes on sweetgum and white oak.
Cutting and handling the logs
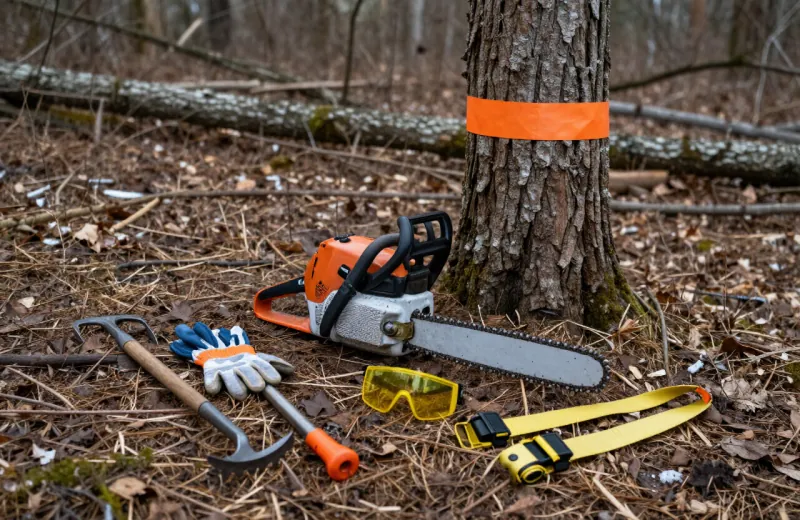
Tree felling can go wrong quickly. If a tree is leaning, damaged, near a structure or power line, or outside your experience level, bring in someone qualified. No mushroom harvest is worth taking chances over.
Once the tree is safely down, we remove the smaller branches with loppers, pruning shears, or a compact pruning saw. Gas chainsaws are useful for larger trees and longer work sessions, while battery-powered saws can be convenient for smaller trees and quick cuts. The best choice depends on the size of the job and the equipment you’re comfortable using.
We cut the trunk and suitable limbs into sections that are large enough to retain moisture but still manageable to move. A log may technically be suitable for mushrooms and still be too heavy to handle comfortably. Shortening a thick log is usually a better solution than struggling with an awkward piece of wood.
A pickaroon can save a surprising amount of bending and make it easier to turn, pull, and reposition logs. Gloves, eye protection, sturdy boots, and properly fitted chainsaw chaps are basic equipment whenever a chainsaw is involved.
For logs that need to be moved farther, ratchet straps and a small trailer make the job much easier. Secure the load carefully and avoid stacking logs so high that they can shift during transport.
The remaining branches don’t have to go to waste. We use a Harbor Freight chipper in the roughly $500–$600 range to reduce smaller branches into manageable material. The same machine can also chop straw for bucket and bag grows, which makes it more useful than a tool purchased for cleanup alone. Always stay within the chipper’s rated capacity and follow its safety instructions.
Don’t wait too long to inoculate
After cutting, we give the logs a short resting period—usually no more than a week or two—before inoculating them. This isn’t a long drying or seasoning process. The goal is to let the freshly cut wood rest briefly without giving wild fungi much time to move in first.
During that period, protect the bark and keep the logs from drying out. We place them somewhere shaded and reasonably sheltered from strong sun and drying wind. Avoid dragging them across rough ground, dropping them unnecessarily, or damaging the bark while moving them. The bark will help the log retain moisture throughout colonization.
Don’t leave the logs sitting in standing water or wrapped tightly in plastic. They need protection from drying, but they don’t need to be sealed into a wet environment that encourages unwanted growth.
Labeling the logs before inoculation also saves confusion later. At minimum, record the tree species and cutting date. Once inoculated, add the mushroom species, strain, and inoculation date. A permanent marker on a durable tag works, although tags should be checked occasionally because weather, animals, and time have a way of separating labels from logs.
We try to inoculate as soon as the short resting period is over. If weather or scheduling causes a delay, keeping the logs shaded and moist becomes even more important. Freshness doesn’t guarantee success, but it gives the intended mushroom culture a much better starting point.
From there, the logs are ready for drilling, filling with spawn, and sealing with wax. Continue with our standard log-inoculation guide for the complete process.
Quick-reference checklist
Before cutting
- Identify the tree while its leaves are visible.
- Confirm that the wood is suitable for the mushroom you want to grow.
- Mark cutting candidates clearly—we use orange ribbon for “cut” and blue for “save.”
- Choose healthy, living trees with intact bark.
- Consider the tree’s value for wildlife, food, shade, erosion control, and the rest of the property.
- Aim for trunks or limbs around four to eight inches in diameter when practical.
- Plan how the logs will be moved before cutting anything.
After cutting
- Remove small branches and cut the wood into manageable sections.
- Handle the logs carefully to protect the bark.
- Label the tree species and cutting date.
- Keep the logs shaded and protected from drying wind.
- Allow only a short resting period—generally one to two weeks.
- Inoculate promptly and add the mushroom species, strain, and date to the label.
A good log is worth planning for
Growing mushrooms on logs is a slow process, so the decisions made on cutting day matter for years afterward. A healthy tree, cut at the right time and handled carefully, gives the mushroom culture a much better place to establish itself.
For us, the process begins months before inoculation. We identify trees while the leaves are visible, mark what should be cut or preserved, wait for cooler weather, and prepare the equipment needed to move the wood safely. By the time the drill and spawn come out, most of the important choices have already been made.
The goal isn’t simply to cut trees for mushrooms. It’s to choose wood thoughtfully, use trees that already make sense to remove, and turn that material into something productive.